| | Alan Cardash Baby Boomerang Build Thread |  |
|
|
| Author | Message |
|---|
owen

Posts : 143
Join date : 2007-12-16
Age : 46
Location : Mentiri
| | Subject: Alan Cardash Baby Boomerang Build Thread Sun Apr 06, 2008 8:23 pm | |
| After much debate and endless searching for that perfect turbine trainer, i have finally made the plunge for the ever so famous Baby Boomerang designed by Alan Cardash as the entry airframe for my Jetcat P80 and took order via Als Hobbies from UK. Order inquiry was made by 20/03, spoke to Ali Machinchy Jr of Als Hobbies Jet Centre and delivery via EMS shipped out of UK by 26/03. It arrived at the post office on Thursday 03/04 safe and sound.  The Boomerang features: Wingspan: 1.930m Length: 1.8m Dry Weight: 6.35Kg Turbine Thrust:30-70N Speed Range: 24-220KPH What this means is that it will slow down to a crawl for those slow landings and also a superb wing loading to do aerobatics just like a pattern plane, but in fact turbine powered! See pics below: 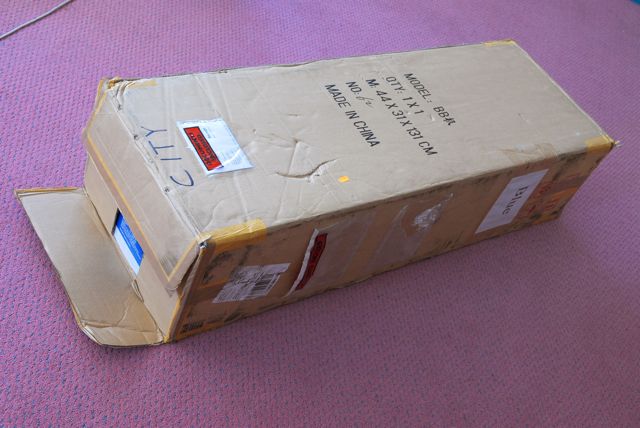 Box as arrived  Sneak Peek!  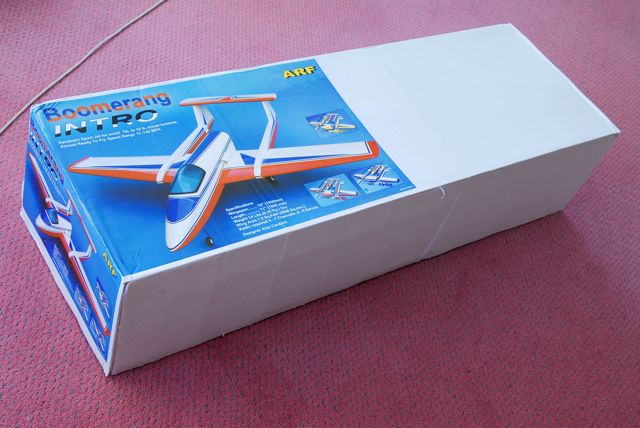 Box Unveiled!!!
Last edited by owen on Wed Apr 23, 2008 10:55 pm; edited 1 time in total | |
|
| | |
owen
Posts : 143
Join date : 2007-12-16
Age : 46
Location : Mentiri
| | Subject: Re: Alan Cardash Baby Boomerang Build Thread Sun Apr 06, 2008 8:26 pm | |
| More Pics.... 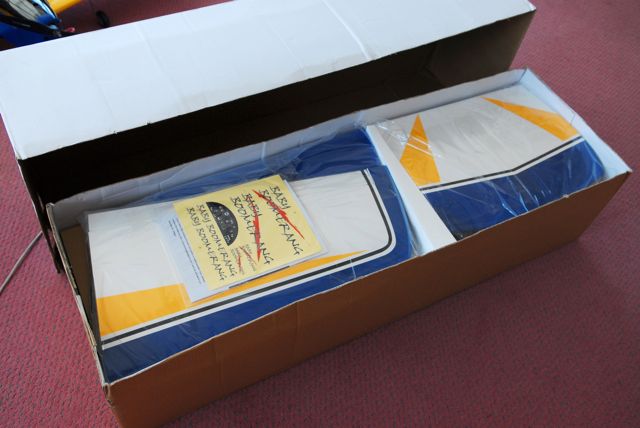 Packaging is the best one i've seen so far for an ARF  Its evident that a lot of QC has been done by Alan Cardash to ensure top quality is delivered for every boomer plane  Minimal parts count. This should translate to a quick build but i will take my time...  | |
|
| | |
owen
Posts : 143
Join date : 2007-12-16
Age : 46
Location : Mentiri
| | Subject: Re: Alan Cardash Baby Boomerang Build Thread Sun Apr 06, 2008 8:40 pm | |
| All the parts/ accessories needed to complete..... i hope.... took me a while to get some of these parts as they are specialty ones... some flown in from the US/UK/S'Pore/LHS 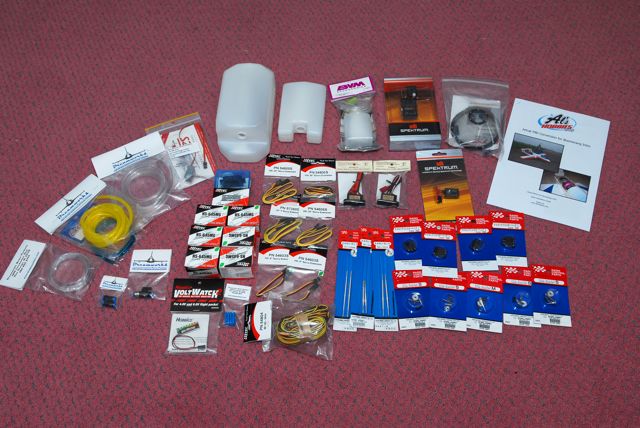 Strewn all over the flooring..... a lot of moolah just for these...   Started the build by drawing out the servo extensions and also CA'ing the hinges  Assembled the linkages and also horns.... all from MK high density/ lightweight aluminium 3.5mm links and Horns  Servo's are all Hitec Hi Torque.... 6kg's for Aileron/Rudders/Flaps and 11kg's for Elevator   Here's what it looks like assembled up  Here's the topside up close 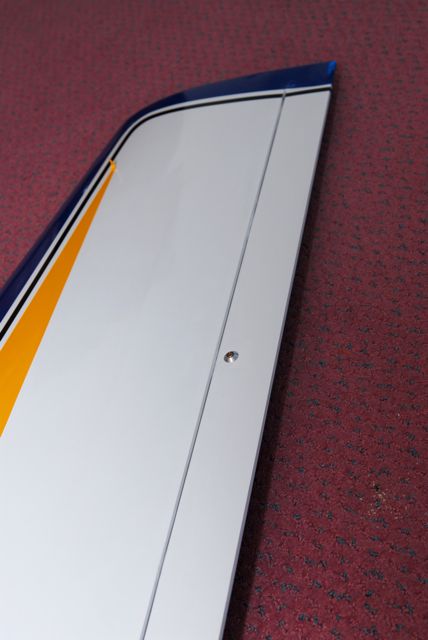 Notice how neat the horns look from above.... good surface area for the horn to 'grab' on the upper side | |
|
| | |
owen
Posts : 143
Join date : 2007-12-16
Age : 46
Location : Mentiri
| | Subject: Re: Alan Cardash Baby Boomerang Build Thread Sun Apr 06, 2008 8:51 pm | |
| More pics below:  Main wing body and fuselage glued up using BobSmith 30mins Epoxy. Clear tape used to strap down the fuse to the wingbody whilst the epoxy cures overnight 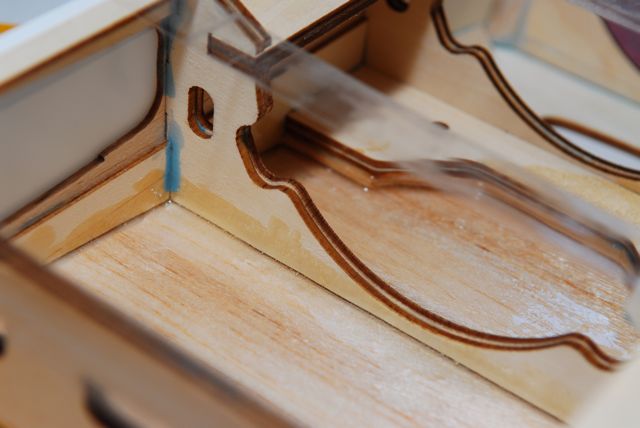 Edges are fillet'ed with epoxy to ensure a good and solid bond with the balsa/ ply between main wingbody and fuselage.  More up-close pics to show epoxy fillets. I'm still assessing the strength of these bonds. If i'm not happy, i will glass it over with 50oz glass cloth to ensure forces are spread evenly between fuse and wingbody. 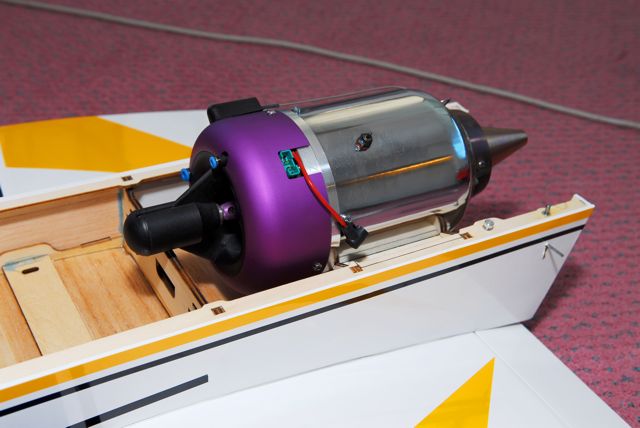 Jetcat P-80 trial fitted and guess what, it doesn't fit... surprise...surprise!!!... not really... the Baby Boomerang was designed for the P-60 however after extensive research from the Internet, there have been several conversions to fit the P-80. This will give over 1:1 power to weight ratio. Only challenge will be the fuel to carry. The P-60 will require 1.5 litres of kero for an average 6mins flight.... with the P-80 i will require 2.0 litres!!!  Rear end with the P-80. I will need to do some trimming on the formers and engine mount to get this baby to fit.... well its dremel time!! | |
|
| | |
owen
Posts : 143
Join date : 2007-12-16
Age : 46
Location : Mentiri
| | Subject: Re: Alan Cardash Baby Boomerang Build Thread Sun Apr 06, 2008 9:17 pm | |
| More pics of the build thread... 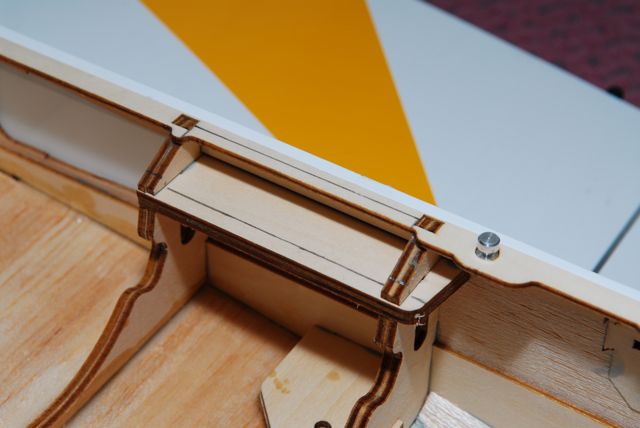 I order to fit the diameter of the P-80, i'll need to hack off approx 5mm from each side. Shown are pencil marks showing trim off areas 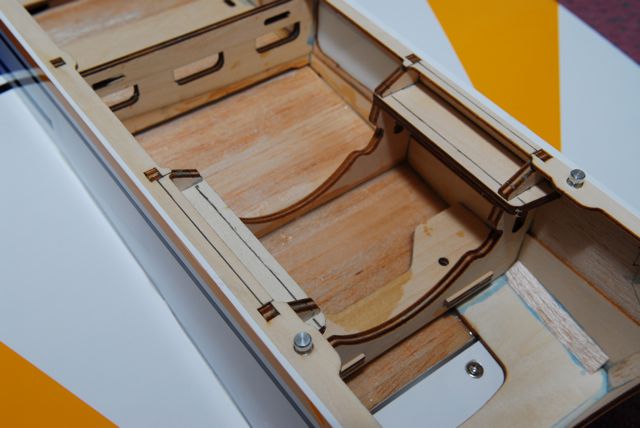 Another view of the turbine mount with marked out areas to be cut or dremeled in this case 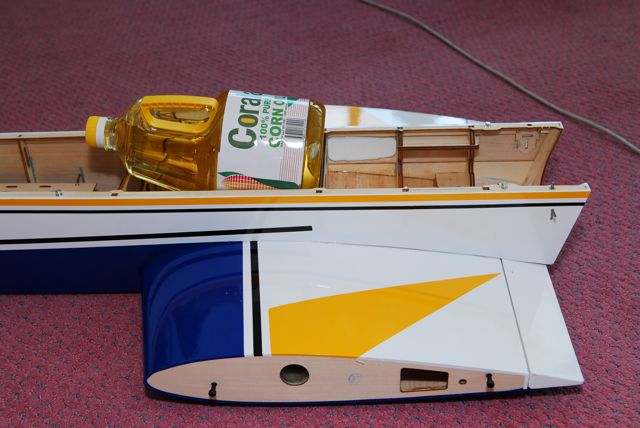 You may have noticed that i've prepared to use a dubro 1.5L tank + 0.5L sullivan slim tank strapped on top, but unfortunately this one didn't fit well i.e. it fouled the canopy hatch. So after much searching from the local supermarket (hua ho to be specific), i managed to get my hands on this 2L cooking oil bottle which has a diameter that fit the boomerang perfectly i.e. 13mm wide! Good thing turbines use fuel pumps which doesn't require the tank to be pressurised  Another view to show the 'fuel tank' 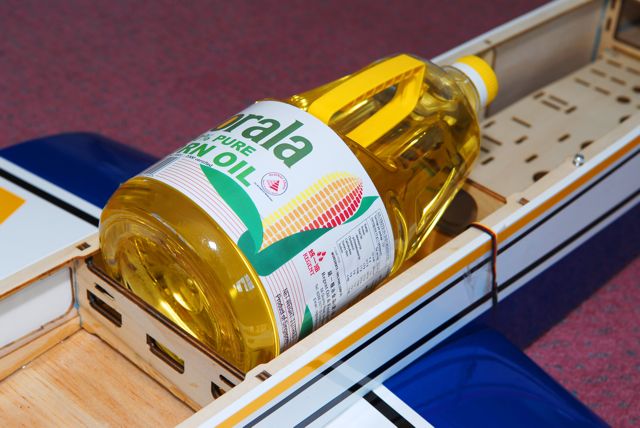 Looks like i'll have to hack a little of the front former to fit this.... but this is expected anyways..... By tmrw, i'll do a leak test with kero in the bottle to see how the original cap holds  Which Oil? Both kills..... one blocks your heart, the other is poisonous....  | |
|
| | |
owen
Posts : 143
Join date : 2007-12-16
Age : 46
Location : Mentiri
| | Subject: Re: Alan Cardash Baby Boomerang Build Thread Mon Apr 07, 2008 12:08 pm | |
| Update from this morning's progress.....  Started the day with the trimming and cutting of the turbine mount in order to make the p-80 clamps fit... 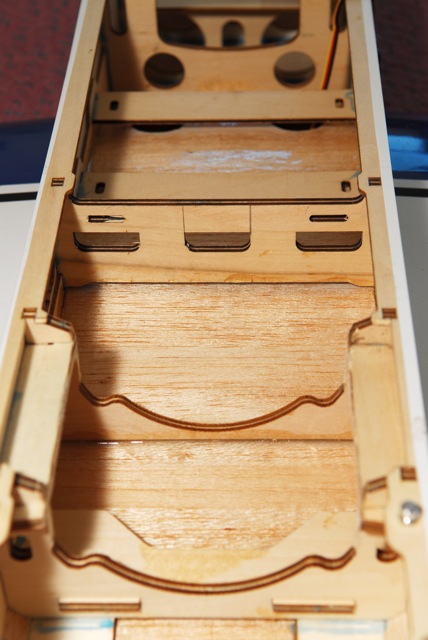 Middle former also need trimming in order to fit the starter cone of the turbine.. so marked out trim lines with pencil  Trial fit the p-80 after hacking off the mounts... fits the diameter nicely  Here's what the middle former looks like after cutting it out. Looks OK  Bottom of the turbine fouls with the rear formers... so these needed to be trimmed down as well | |
|
| | |
owen
Posts : 143
Join date : 2007-12-16
Age : 46
Location : Mentiri
| | Subject: Re: Alan Cardash Baby Boomerang Build Thread Mon Apr 07, 2008 12:21 pm | |
| More pics...  Here's what it looks like after both rear formers have been trimmed to fit the lowest curvature of the turbine housing  Now the clamps need to be cut in order to fit the turbine ply mounts. Need triming approx 5mm from the ends...  These steel clamps are pretty hard material... even my dremel with cutting disc at 33,000RPM broke a few times in the process of cutting these out. I made a nice groove 3/4 way before stress bending them .  Stress bent and then broken off.... beware of the sharp edges!! 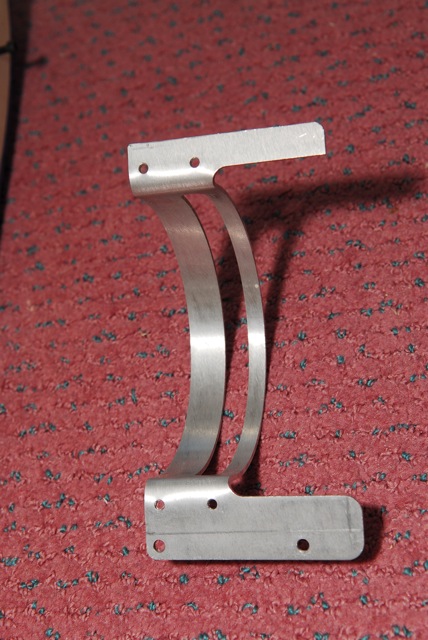 Edges rounded off and sharp edges smoothed using dremel sanding bit 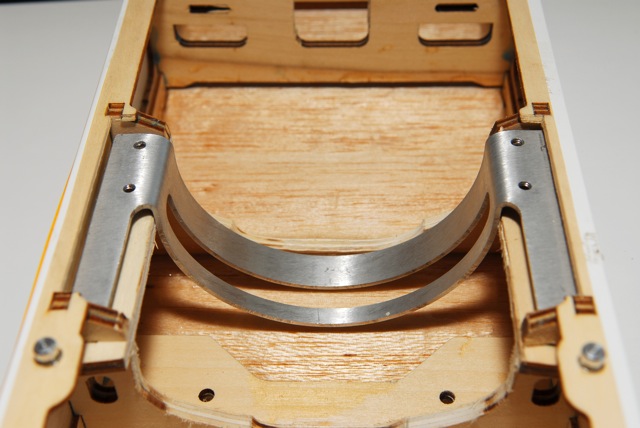 Clamp now sits nicely in place...hurray!!!   Turbine now sat down on the clamps.... perfect snug fit end to end. Bottom still fouls with the formers, but these will be lifted off by sandwiching 6mm ply to lift the turbine slightly  Marked out the mount doublers on 6mm Poplar Aerograde Plywood...  My trusty OLFA saw tip for cutting small sections of ply. This narrow-staggered toothed saw makes cutting 6mm ply effortless!  Well...almost perfect fit.... second to laser cut pieces... hehehehehe  Epoxied the doublers on the mounts and clamped in place for a good solid bond..... I'm gonna stop it from here to let the epoxy dry off.... Hope you've enjoyed reading this thread so far.... more updates soon.... | |
|
| | |
azrc

Posts : 155
Join date : 2007-12-15
Location : Seria,Brunei
| | Subject: Re: Alan Cardash Baby Boomerang Build Thread Mon Apr 07, 2008 5:47 pm | |
| Owen, nice pics. Nda sabar rasanya kan meliat ur jet plane flying at Tanah Jambu  . Insyaallah cuti 2nd term, we plan to fly di Tanah Jambu again. Btw good job and be patience  | |
|
| | |
owen
Posts : 143
Join date : 2007-12-16
Age : 46
Location : Mentiri
| | Subject: Re: Alan Cardash Baby Boomerang Build Thread Tue Apr 08, 2008 7:23 pm | |
| AZRC, thanks for the compliments....hehehe...i have been patient for a loooonggg time..... its time to move this baby into the air! Anyways, on with the build thread.... Since i felt that the airframe needed more reinforcement, i've decided to go on the glassing route on the joints between the main wingbody to the fuselage. 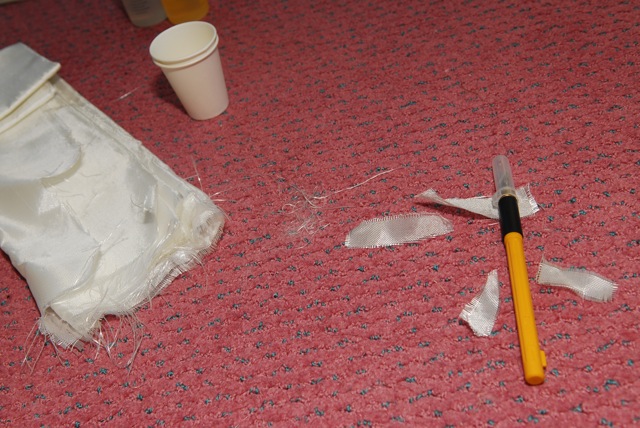 150g/m2 fibreglass cloth was used for reinforcing works... only small strips on critical joints.... 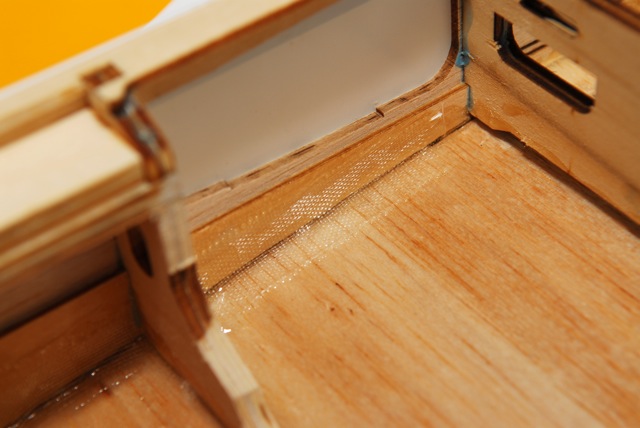 One section showing glass cloth resin'ed in place. This step is repeated on all sections/ sides of the fuse.  Important to glass the last former....  And also the front former where the wingbody meets the fuselage 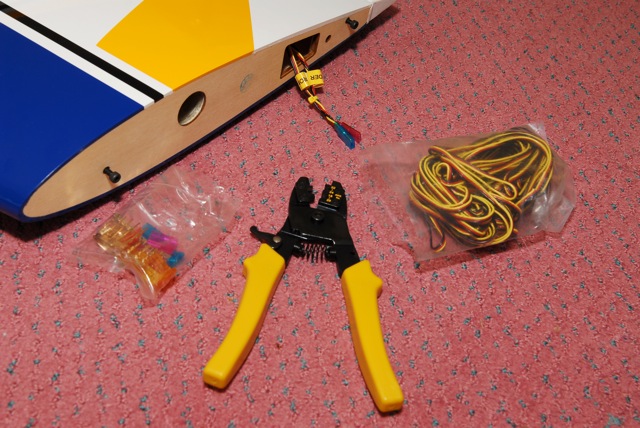 Custom made extensions and Y-Harnesses using crimper tool and Hitec HD servo wire  All servo connections and wires were routed on one side of the fuselage. Labelled also for easy identification and eliminate confusion  Servo extensions and connectors in place ready to receive boom and wing sections. | |
|
| | |
owen
Posts : 143
Join date : 2007-12-16
Age : 46
Location : Mentiri
| | Subject: Re: Alan Cardash Baby Boomerang Build Thread Wed Apr 09, 2008 11:45 am | |
| Morning Peeps... This morning started with some heat proof painting on the tail end of the fuse as well as fitting the flight avionics. Let the pictures do the talking... heheheh 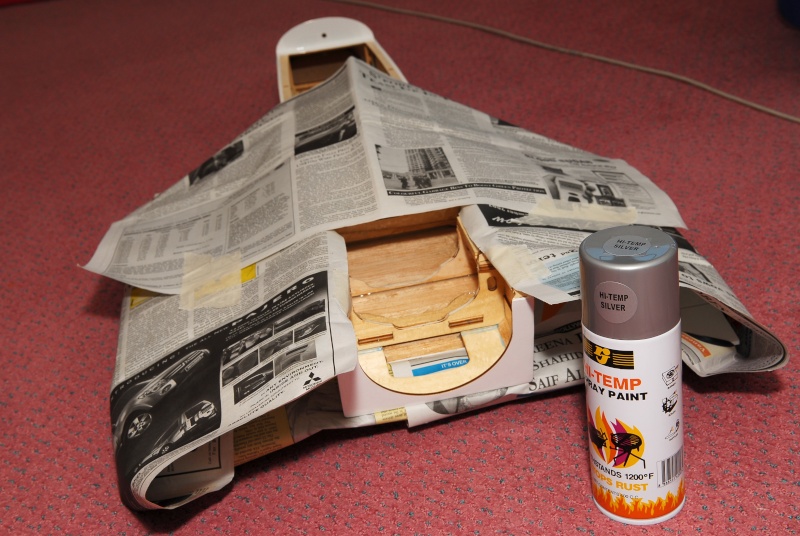 Masked off area so that spray paint can be concentrated on the tail end where the fuse will see the most heat from the turbine exhaust outlet. Epoxy resin has nicely dried off and was ready for the paint. Heat proof paint can be obtained from Hua Ho hardware store. 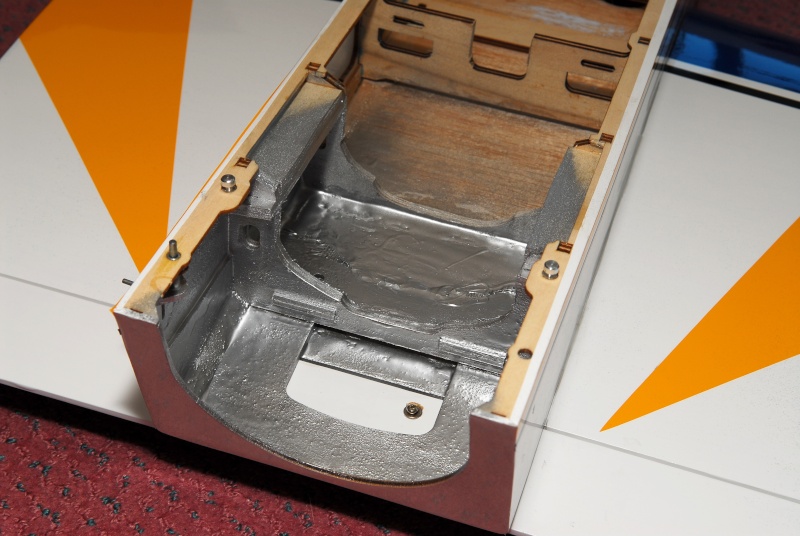 Done! some overspray here and there... but nothing that thinner wouldn't remove easily....  Some planning on the electronics layout... spotting the BVM UAT (Ultimate Air Trap), Kero & Propane Valves, Jetronic Air Valve, Receiver, Voltage Indicator, Switches (x2) and Fuel Pump  Cut out and drilled the holes... secured all the equipment in place....  I think this is where i will mount the ECU. I have to make space for the air tank and also the retracts setup which has yet to arrive... I will be using Spring Airs 101HD which is a single acting spring to deploy and air to retract setup. 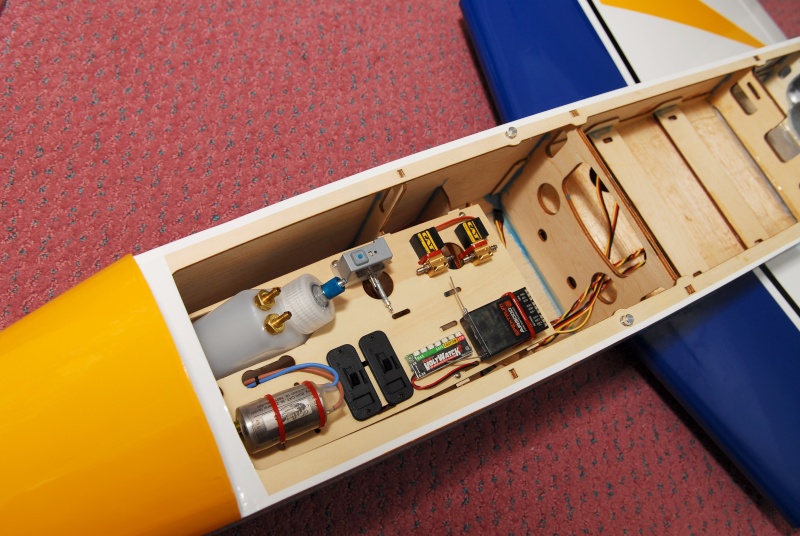 Tray fitted back into fuselage... looking good....i will begin on the plumbing and cabling works a bit later on...  A closer look of the equipment tray | |
|
| | |
azrc
Posts : 155
Join date : 2007-12-15
Location : Seria,Brunei
| | Subject: Re: Alan Cardash Baby Boomerang Build Thread Wed Apr 09, 2008 1:19 pm | |
| OWEN, nice equipment arrangement! BTW I saw u work on the carpet with fibre glass. Make sure you vacuum clean the carpet or else the itchy glass cloth may contact ur skin!  Hope to see ur next thread. | |
|
| | |
owen
Posts : 143
Join date : 2007-12-16
Age : 46
Location : Mentiri
| | Subject: Re: Alan Cardash Baby Boomerang Build Thread Wed Apr 09, 2008 2:01 pm | |
| AZRC,
Thanks for the concern.... and yes i did vacuum it afterwards... in fact one trick with glass fibres is to use a piece of foam, pour epoxy over it until its partially dry... use that to rub on the carpet... glass fibres if exposed to resin will stiffen up and stick.... its a good way to pick them up too... i use that from my leftover epoxy for the visible threads.... | |
|
| | |
owen
Posts : 143
Join date : 2007-12-16
Age : 46
Location : Mentiri
| | Subject: Re: Alan Cardash Baby Boomerang Build Thread Wed Apr 09, 2008 11:27 pm | |
| The build continues on, though limited progress this afternoon and evening.  Turbine mounted and bolted in place.  A view from the side. Prolly need to dremel a recess in the mounts to accomodate the slight uptrhust caused by the mounting clamp screws  The most likely tank configuration i.e. inverted mount 1.5L tank so that bulge end is on top and the vertically mounted sulivan 0.5L tank. Next will be the plumbing.  GSU (Ground Support Unit) Interface mounted on 2x sandwiched 6mm ply in order to raise it up, spotted and screwed in place.  Interface mount epoxied in place. The side was utilised to maximise space on the tight compartment and also to make the equipment tray look clean and uncluttered. It also facilitates easy removal of the GSU cables (RJ Cable style connectors) when connecting to the ECU for startup monitoring and setting up. | |
|
| | |
owen
Posts : 143
Join date : 2007-12-16
Age : 46
Location : Mentiri
| | Subject: Re: Alan Cardash Baby Boomerang Build Thread Sun Apr 13, 2008 9:39 pm | |
| Wow with espeed down for two days straight... here's the progress thus far. I'm beginning to feel the withdrawal symptom from the 'lack' of the internet!!  GSU interface mounted at optimum position so that status LEDs are visible and also permit for easy connecting and disconnecting of the GSU cable.  Began work on the fuel plumbing. 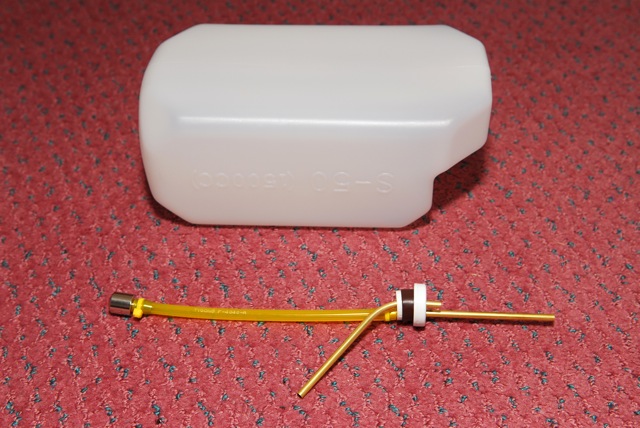 Clunk and vent line for 1.5L main fuel tank  Clunk and vent line for 0.5L secondary fuel tank  Tanks mounted in position and also vent line plumbed to the side of the fuselage via a 6mm exit hole  Prepping up the 4mm festo transparent line for fuel pump discharge and also gas lines to turbine  Equipment tray finalised with all festo fittings for 4mm lines. Installed manual shutoff ball valve + festo tee for main kerosene line split to both kero and gas solenoids  Another view from the opposite side | |
|
| | |
owen
Posts : 143
Join date : 2007-12-16
Age : 46
Location : Mentiri
| | Subject: Re: Alan Cardash Baby Boomerang Build Thread Sun Apr 13, 2008 9:52 pm | |
|  Former on canopy hatch needed removal due to fowling with inverted main tank setup  Due to the oversized turbine used on this model, i've decided to open up some air inlets on the top of the hatch to minimize compressor surge/stall due to lack of air (or in this case, suck hot air from the back of the turbine!)  I had to remove the trim lines since they are off centered. I've cut these holes from the back side and discovered that the finishing lines were not in line. Luckily the profilm covering is not fully bonded... so i was able to peel these off and then iron them back on.  This is what it looks like with the trim back on. 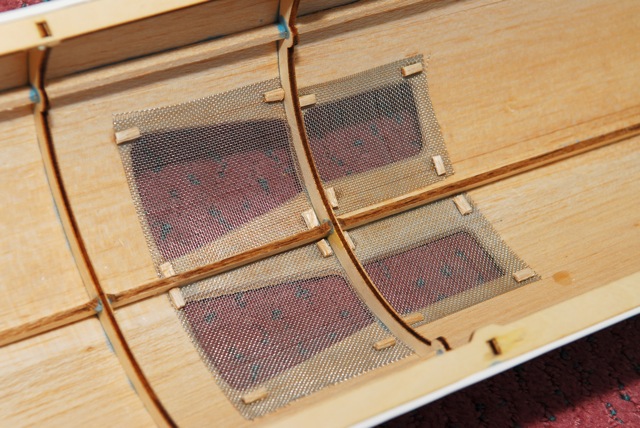 Hacked up more inlet openings... and eventually lined them up with fine wiremesh, which serves as an FOD screen (Foreign Object Damage). I sorta tacked them in place with CA + scrap balsa before epoxying them in place  This is the end product from the topside. Looks smooth!   Next bit was to epoxy the hatch upper-side which will see 'heat' from the turbine tail pipe. This is done to prepare for painting with heat resist paint  Masked out the areas where i don't want to see paint....  Two coats of heat resist paint.... cleaned off overspray with paint thinner... looks good and fits snug on the fuselage. Looks like this will prolly be the last post at least until i have received my retracts setup. So watch this space. | |
|
| | |
owen
Posts : 143
Join date : 2007-12-16
Age : 46
Location : Mentiri
| | Subject: Re: Alan Cardash Baby Boomerang Build Thread Tue May 06, 2008 4:25 pm | |
| Sadly haven't gotten any news on my SpringAir retracts as of yet. They have notified me that it was shipped out sometime last 2 weeks. Unfortunately, they have sent via standard US parcel which will take quite a while to get here.... So out of boredom, i've put together the boomerang just to see what it looks like.... man, this thing is big and heavy! Imagine, if i stood the model up on its nose, it would be sightly taller than me! One of these days, i gotta do a photo of my RC models and me! Here's a peek.... 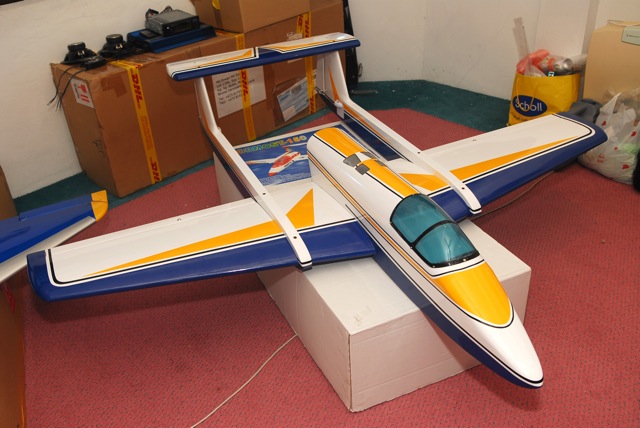 | |
|
| | |
owen
Posts : 143
Join date : 2007-12-16
Age : 46
Location : Mentiri
| | Subject: Re: Alan Cardash Baby Boomerang Build Thread Sat May 24, 2008 11:49 pm | |
| Yipee!!... guess what came in the mail?! The retracts.... here's a peek of progress thus far...  All the way from Melbourne, Florida!! 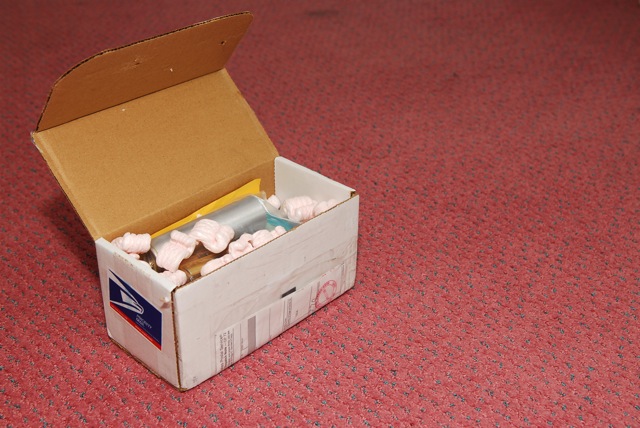 Packaging is so so....  Ho Cottage industry product... hehehe... complete with wire struts too 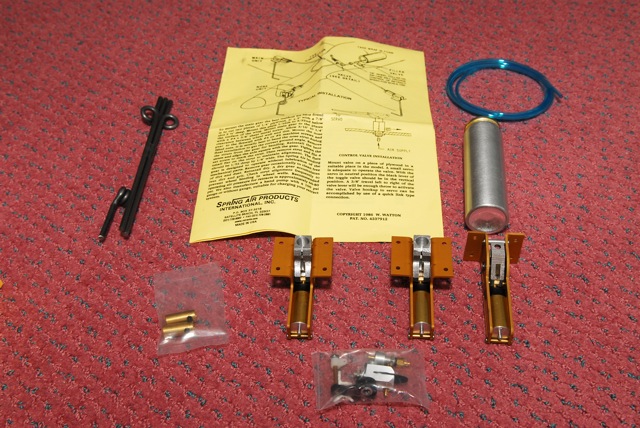 Out of its packaging. Complete with a basic air valve, but i won't be using it since i've got the jetronic single acting solenoid already 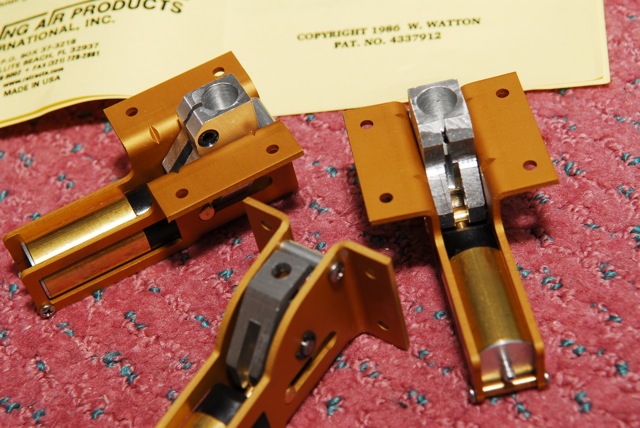 Machining quality is average. I've seen smoother and better machined retracts, but i guess i cannot complain for the price.... it USD$200 for a complete retract set which is pretty good! 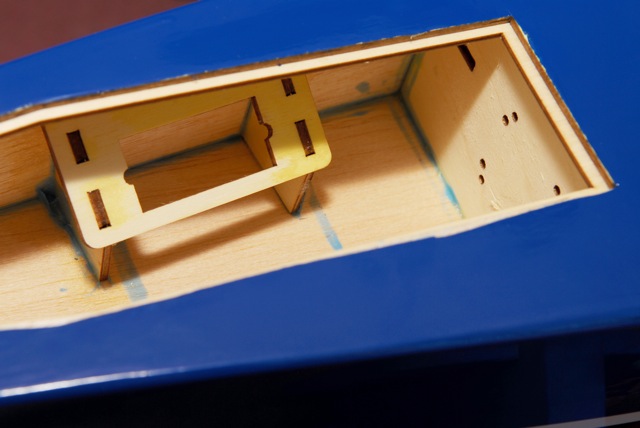 Pic of the front former where the firewall mounted retract will be positioned. Note also the tray for steering servo 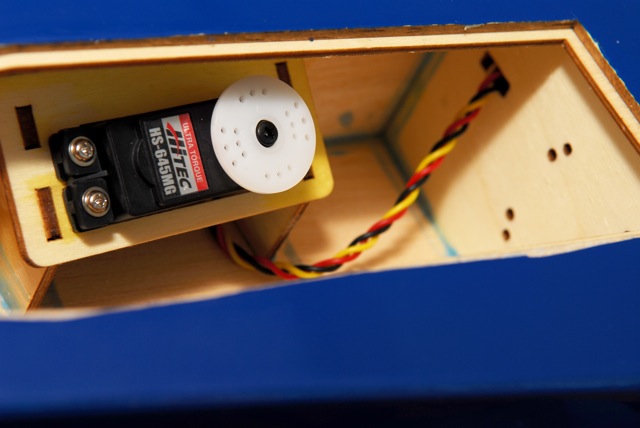 Steering servo mounted in place. Note the prepared mounting holes for the nose gear. Outer holes are for the Springair retracts and the inner holes are for fixed landing gear 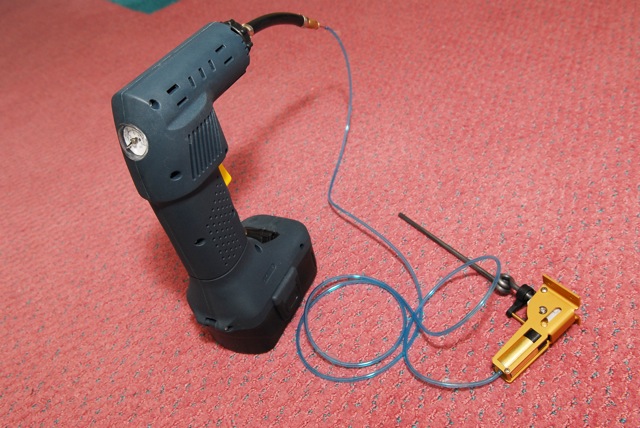 Tested each retract unit for any air leaks. All retracts check out nicely.... and hold pressure upto 10psi 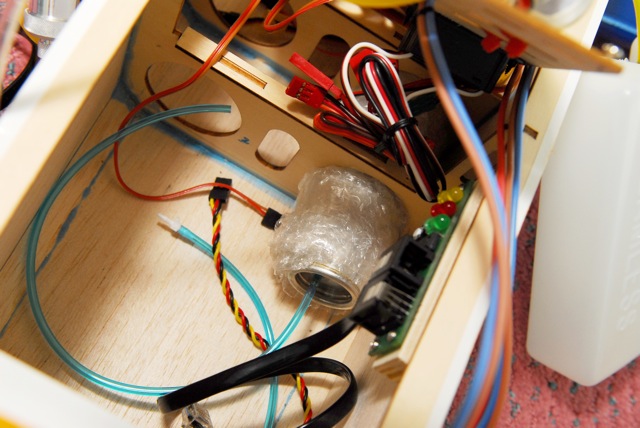 Air tank is smaller than the pre cut mounting trays, hence wrapped in bubble wrap to achieve the fit More pics to come of the install.... its getting there! | |
|
| | |
Sponsored content
| | Subject: Re: Alan Cardash Baby Boomerang Build Thread | |
| |
|
| | |
| | Alan Cardash Baby Boomerang Build Thread | |
|